Auto relays are crucial components in vehicle electrical systems. They control high-current circuits using low-current signals, acting as switches. Testing these relays is essential for diagnosing electrical issues. Proper testing ensures that relays function correctly, which can prevent potential problems in your vehicle's electrical system. This guide provides a step-by-step approach to checking auto relays effectively.
Understanding how to test relays can help identify electrical faults and ensure proper vehicle operation. Accurate testing can save time and money by addressing issues before they become more severe. Whether you perform tests yourself or seek professional help, such as a Mechanic Shop Open on Sunday, knowing the process is invaluable.
Understanding Auto Relays
Auto relays are electrical switches that control circuits with a low-current signal. They allow a small current to switch a larger one on and off. Relays are found in various systems, including lighting, starting, and fuel systems. Each relay consists of an electromagnet, an armature, and contacts that open or close to complete or interrupt a circuit.
These components play a vital role in ensuring that various electrical systems in a vehicle operate smoothly. Understanding their function is key to diagnosing electrical issues. Knowing how to check these relays will help you maintain your vehicle's electrical system efficiently.
Safety Precautions Before Testing
Before testing auto relays, ensure the vehicle is turned off and the ignition is disconnected. Disconnect the negative battery terminal to prevent accidental electrical shorts or shocks. Wear protective gear such as gloves and safety glasses to protect yourself from potential hazards.
Proper safety precautions are crucial to avoid damage to the vehicle's electrical system and to ensure personal safety. Follow these steps diligently to create a safe environment for testing and prevent any electrical accidents or injuries during the process.
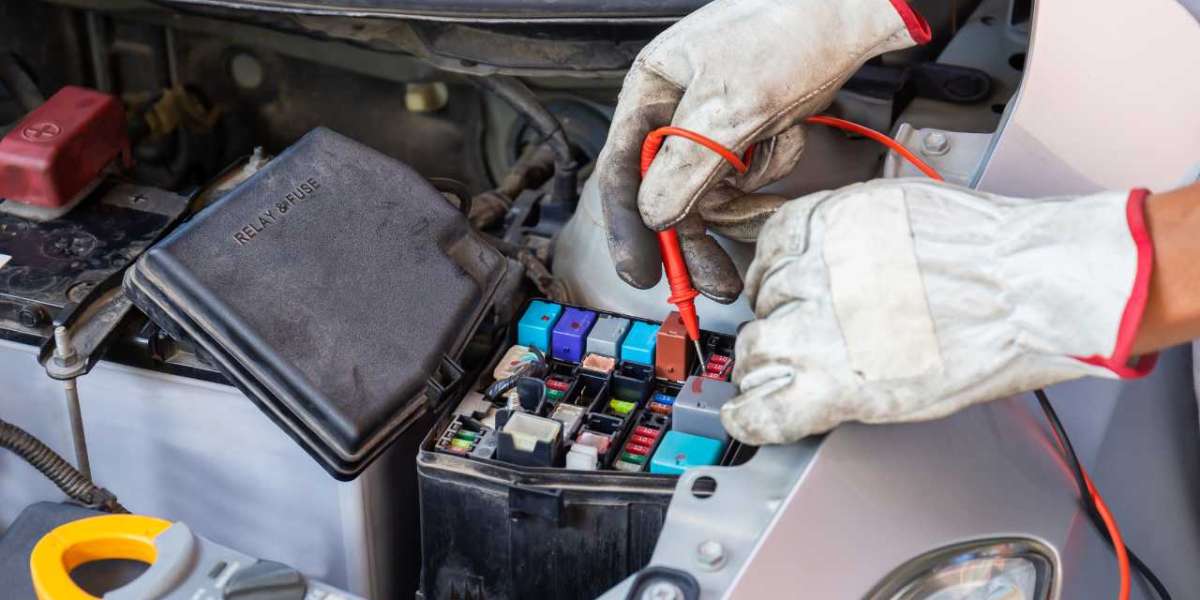
Identifying the Relays in Your Vehicle
Relays are typically located in the fuse box or relay box under the hood or dashboard. Refer to the vehicle's owner's manual or a repair guide to locate the relay box and identify the relays. The manual will usually provide a diagram indicating the position and function of each relay.
Proper identification is crucial for effective testing and troubleshooting. Knowing the exact location and function of each relay will help you focus on the specific components that need examination, streamlining the diagnostic process.
Tools Needed for Testing Relays
Essential tools for testing auto relays include a multimeter, relay tester, and jumper wires. A multimeter measures electrical voltage, current, and resistance, which helps in checking relay functionality. A relay tester specifically tests relay operation, making it easier to diagnose problems.
Jumper wires are useful for bypassing relays and testing circuits. Having these tools on hand ensures you can perform accurate tests and quickly identify any issues with the relays in your vehicle’s electrical system.
Checking Relay Operation with a Multimeter
To check the relay operation with a multimeter, start by setting the meter to measure resistance (ohms). Remove the relay from its socket and test the relay’s coil by measuring the resistance between the coil terminals. A typical relay should show a low resistance value, indicating that the coil is functional.
Next, check for continuity between the relay’s contact terminals when the relay is energized. This test confirms whether the relay can properly switch the circuit. Accurate measurements help determine if the relay is working correctly or if it needs replacement.
Testing Relay Continuity
Testing relay continuity involves checking if the relay completes the circuit when it is activated. Use a multimeter to measure continuity between the relay’s contact terminals. Insert the relay into its socket and activate the relay by applying power to the coil.
Check if the multimeter indicates continuity when the relay is energized. If there is no continuity or the reading is inconsistent, the relay may be faulty and require replacement. This test is essential for ensuring that the relay can effectively switch electrical circuits.
Using a Relay Tester
A relay tester simplifies the process of checking relays. Insert the relay into the tester according to the manufacturer’s instructions. The tester will activate the relay and indicate whether it operates correctly.
Relay testers often provide clear results, such as lights or digital readouts, showing if the relay is functioning as expected. Using a relay tester can speed up the diagnostic process and reduce the risk of errors compared to manual testing methods.
Inspecting Relay Connections and Wiring
Inspecting relay connections involves checking for loose, corroded, or damaged wires and connectors. Ensure that all connections are secure and free from debris or corrosion. Corroded or loose connections can affect relay performance and cause electrical issues.
Proper inspection can prevent problems caused by faulty wiring or poor connections. Ensuring that all connections are in good condition is essential for reliable relay operation and overall vehicle electrical system performance.
Interpreting Relay Test Results
Interpreting test results involves understanding what the measurements and observations indicate about relay performance. A properly functioning relay should show consistent resistance, continuity, or proper operation when tested.
If test results indicate abnormalities, such as inconsistent readings or lack of continuity, the relay may be faulty. Comparing test results with manufacturer specifications can help determine if the relay needs repair or replacement, ensuring accurate diagnostics.
Common Issues and Troubleshooting
Common issues with auto relays include malfunctioning due to wear and tear, electrical shorts, or improper connections. Symptoms may include non-functioning electrical components or intermittent operation. Troubleshooting involves checking relay operation, connections, and wiring.
Addressing these issues often involves replacing faulty relays or repairing damaged wiring. Systematic troubleshooting helps identify the root cause of problems and ensures effective resolution, maintaining the vehicle’s electrical system in good working order.
Replacing Faulty Relays
Replacing a faulty relay involves removing the old relay and installing a new one. Ensure the replacement relay matches the specifications of the original. Properly install the new relay into its socket, making sure it is securely seated.
Test the new relay to confirm that it operates correctly and resolves the electrical issue. Replacing faulty relays is essential for maintaining the functionality of vehicle systems and preventing further electrical problems.
To read more articles visit Anthonymartialclub
Conclusion
Testing auto relays is a crucial part of vehicle maintenance and troubleshooting. Understanding how to check and interpret relay performance ensures that your vehicle’s electrical systems operate reliably. Accurate testing helps identify issues early, preventing potential problems.
Whether you perform these tests yourself or seek professional assistance, such as from a mechanic shop open on Sunday, knowing the proper procedures is valuable. Maintaining functional relays is essential for the smooth operation of your vehicle’s electrical components.